Drop Down MenusCSS Drop Down MenuPure CSS Dropdown Menu

Sunday, June 11, 2017

Getting Started Chatbot using Azure Bot Service


Introduction:
The Azure Bot Service is powered by the Microsoft Bot Framework and bot service allows developers to build conversational applications that plug into many popular chat applications including Facebook Messenger, Skype and Office 365, etc. In this article, we can be creating and testing a bot by using the Azure Bot Service.

Create new Bot Service:
Logon to the Azure portal with your registered Azure Microsoft account. If you don’t have azure subscription, you can Create a free trial Azure subscription from Azure portal.
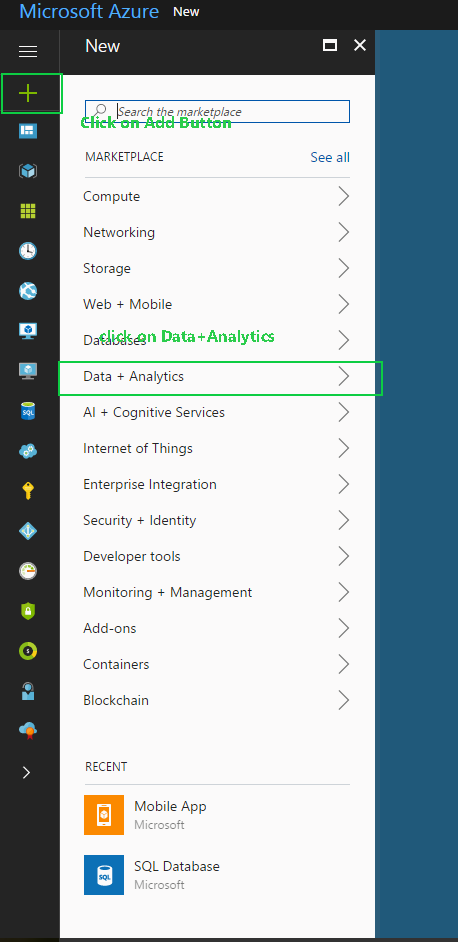
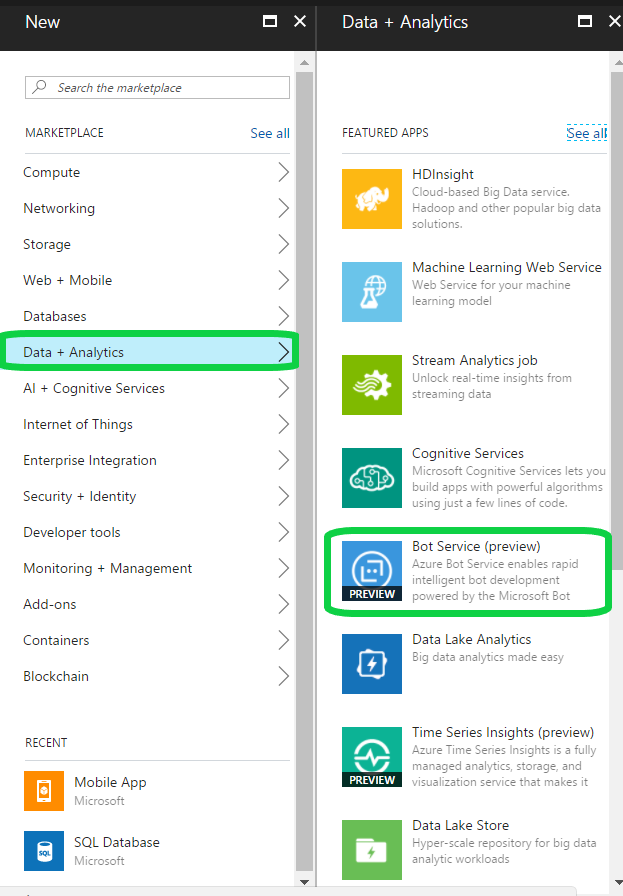
In Azure Portal > click on + Add > Select on Data Analytics
Step 1: Select on new Bot service from data analytics menu
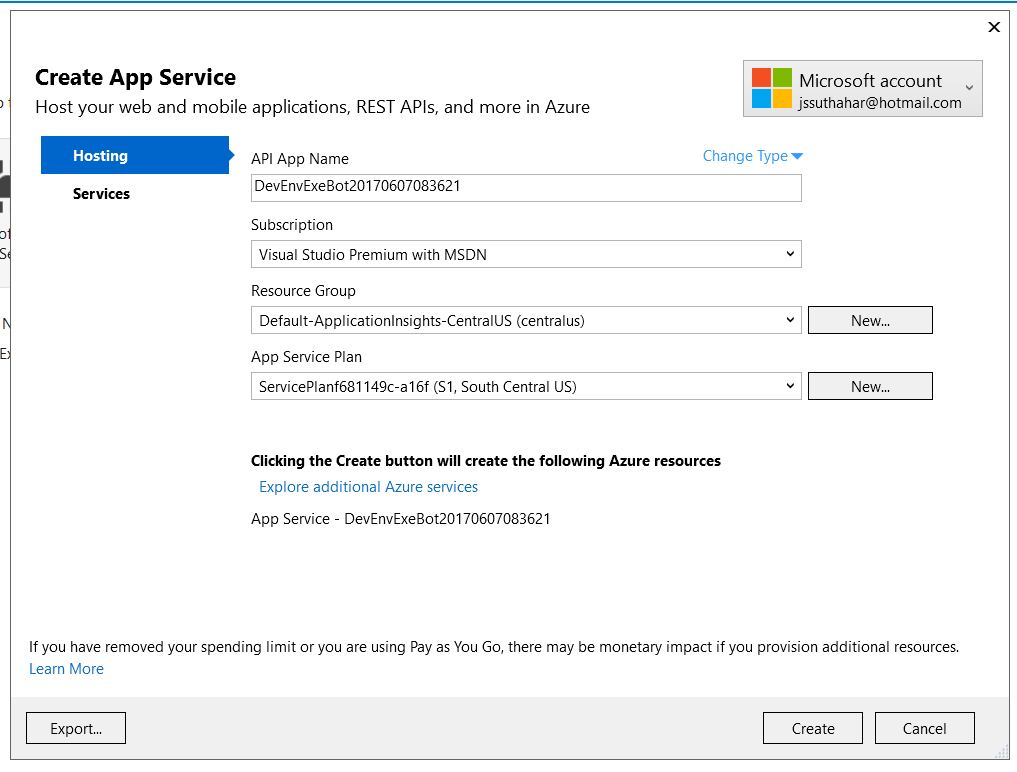
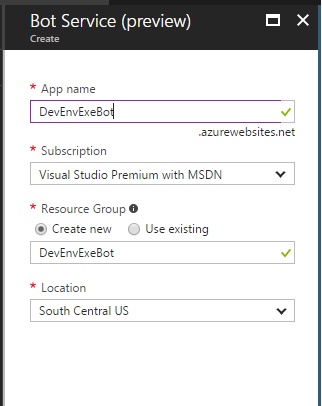
Step 2: You can provide following information for create new bot service
  1. unique App name to your bot’s name. The name is used as the subdomain in azure website (eg DevEnvExeBot.azurewebsites.net).
  2. Select the Azure subscription.
  3. Select the resource group or create new user group.
  4. Select the location. And click on Create button
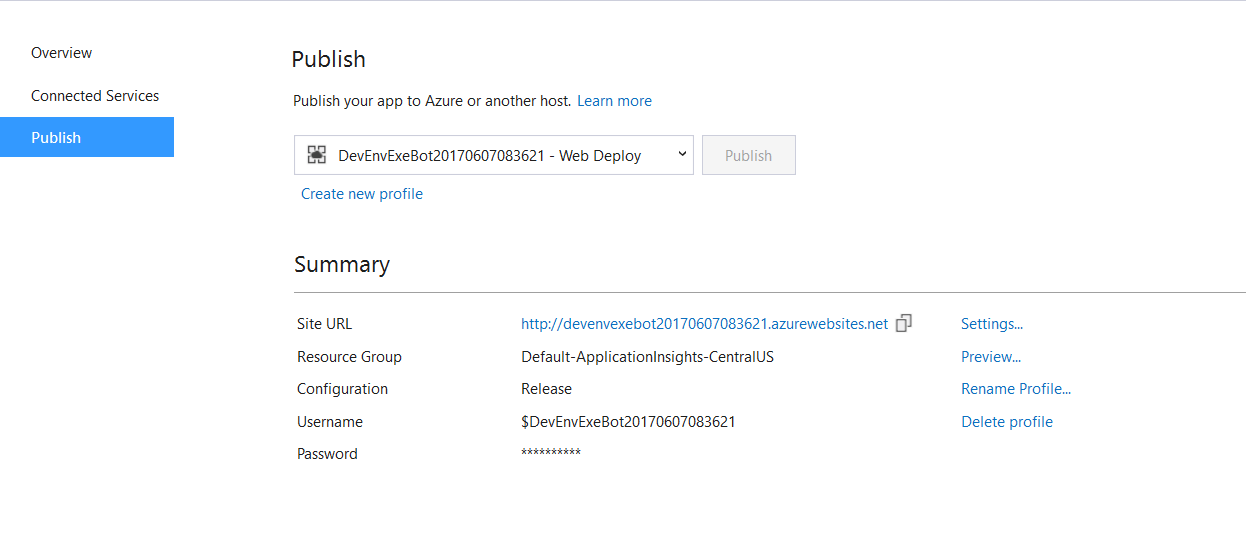
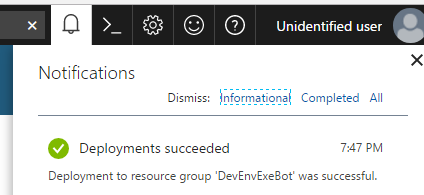
Step 3: After clicking on Create button, wait a few minutes for the Bot Service to be deployed successfully before proceeding. You will get confirmation notification for after success.
Register Bot Application:
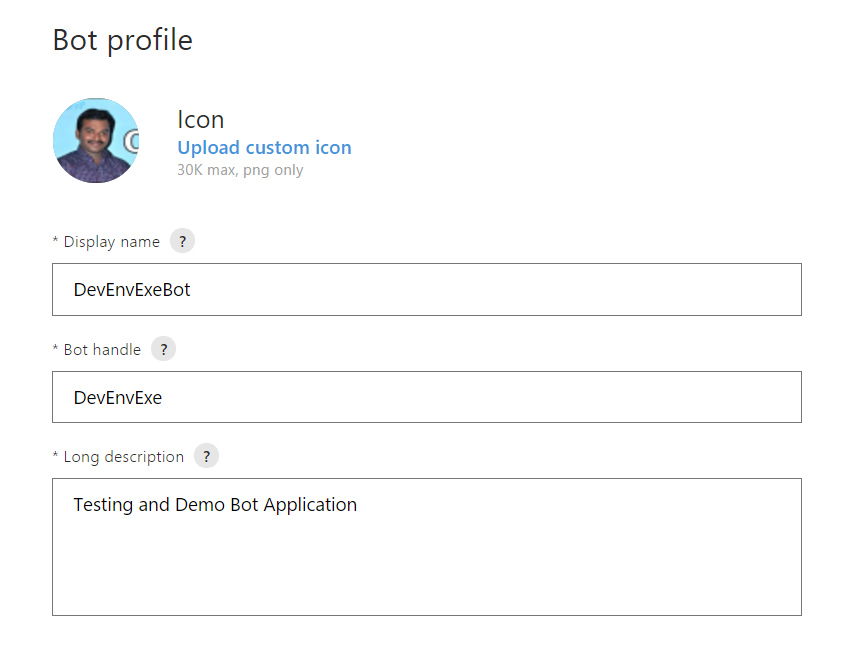
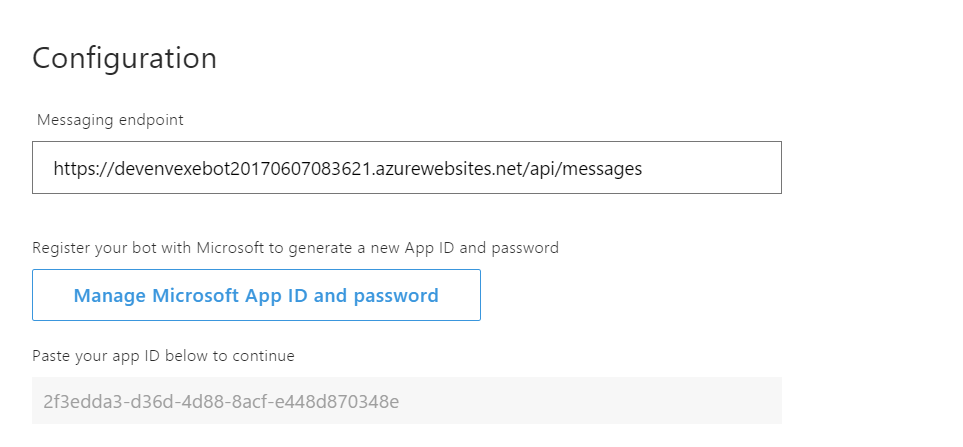
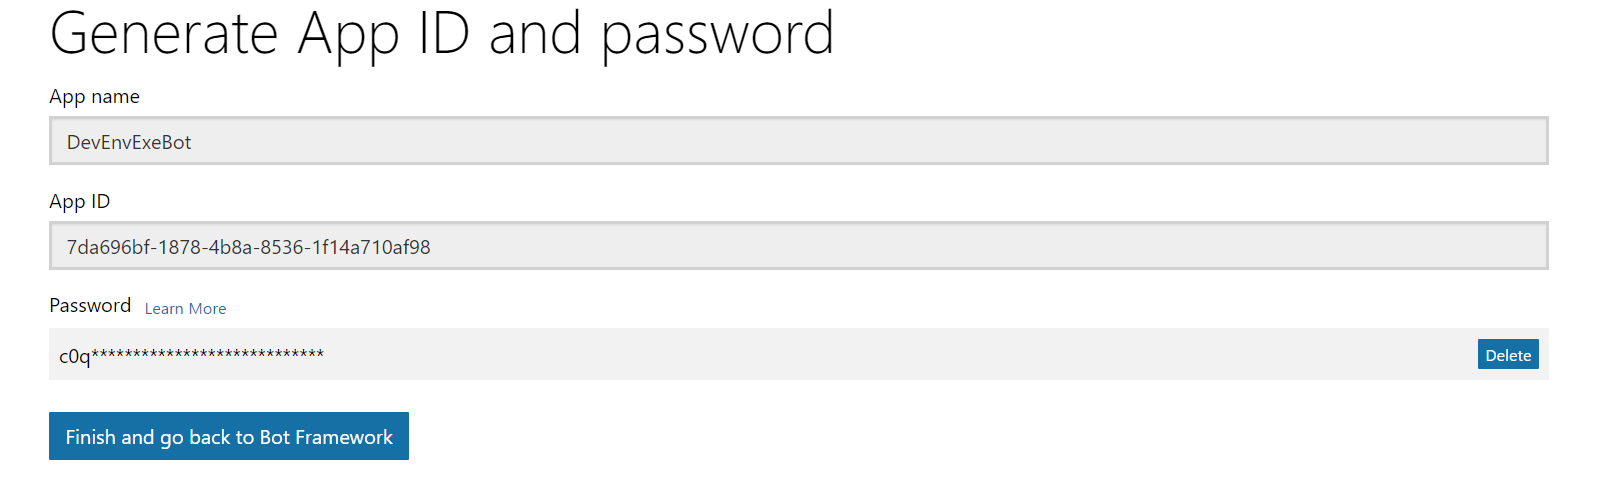
You can click on confirmation notification. then, you will get the following screen where you need to create App ID. This is a prerequisite to authenticating your bot with the bot framework.
Step 1: Click on Create Microsoft App ID and Password
Step 2: App ID and password will generate following screen and click on button for go back to Bot framework
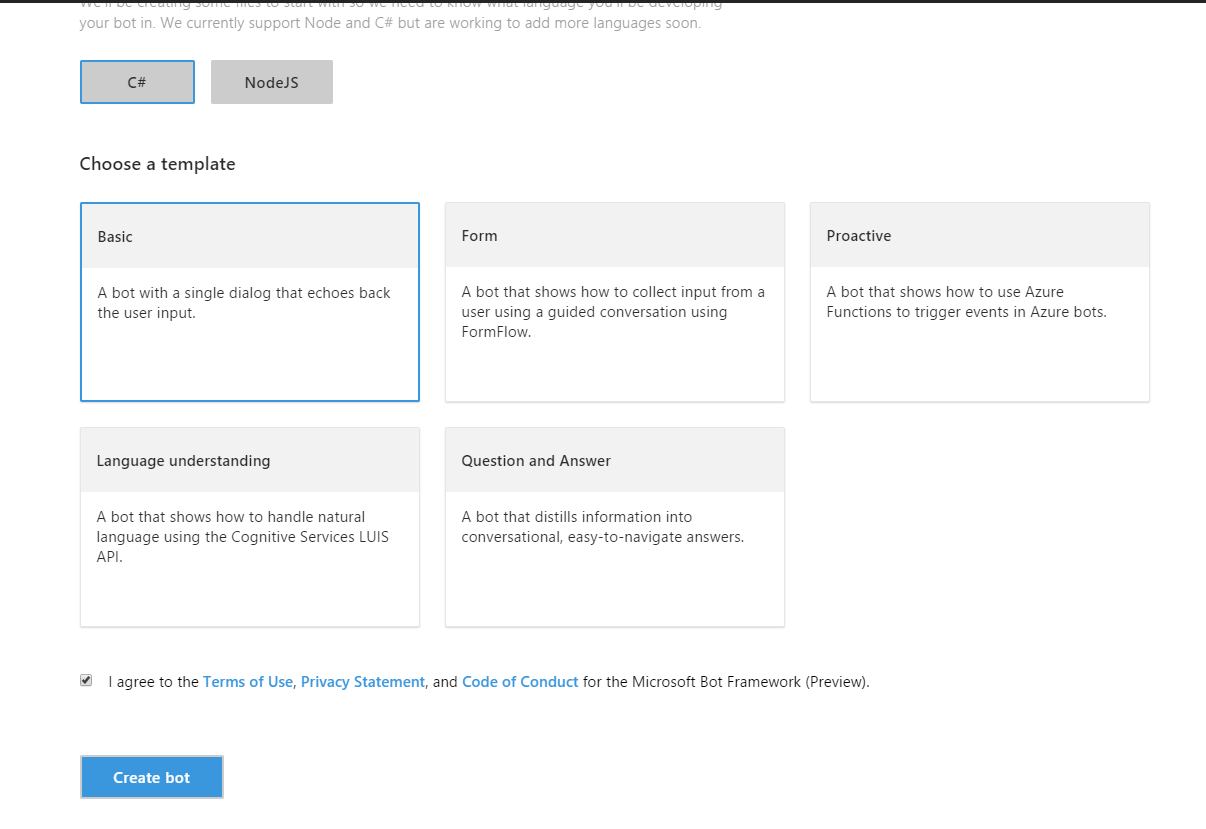
Step 3: Select the Programming language and template for developing bot application
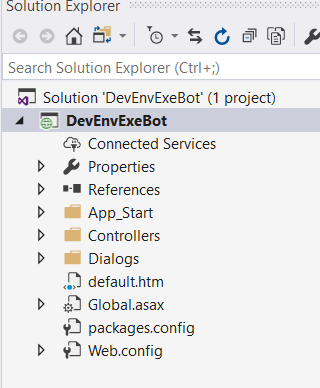
Step 4: Now bot application successfully created and running in the cloud, you can edit code from Azure Develop code editor and also you can manage channels, analytics and setting.

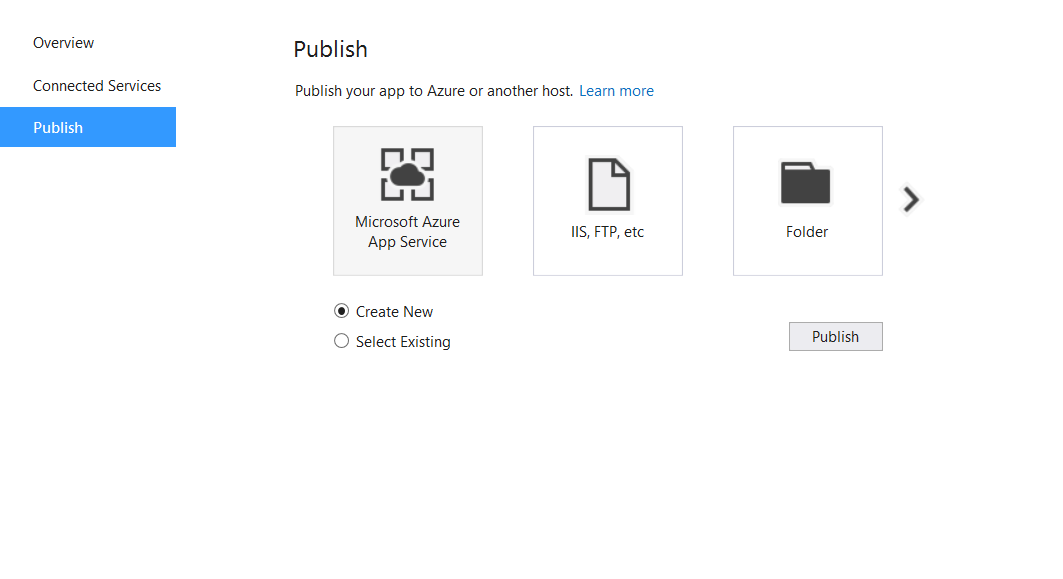
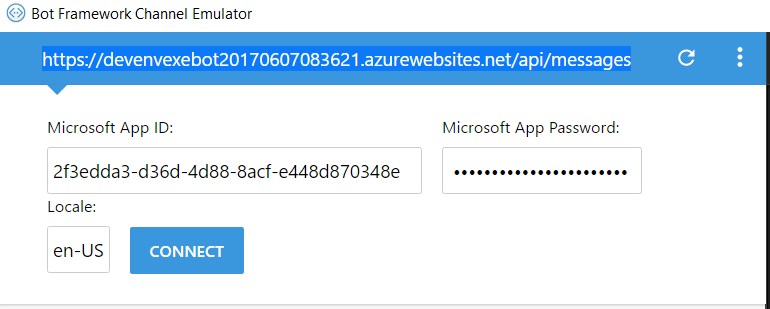
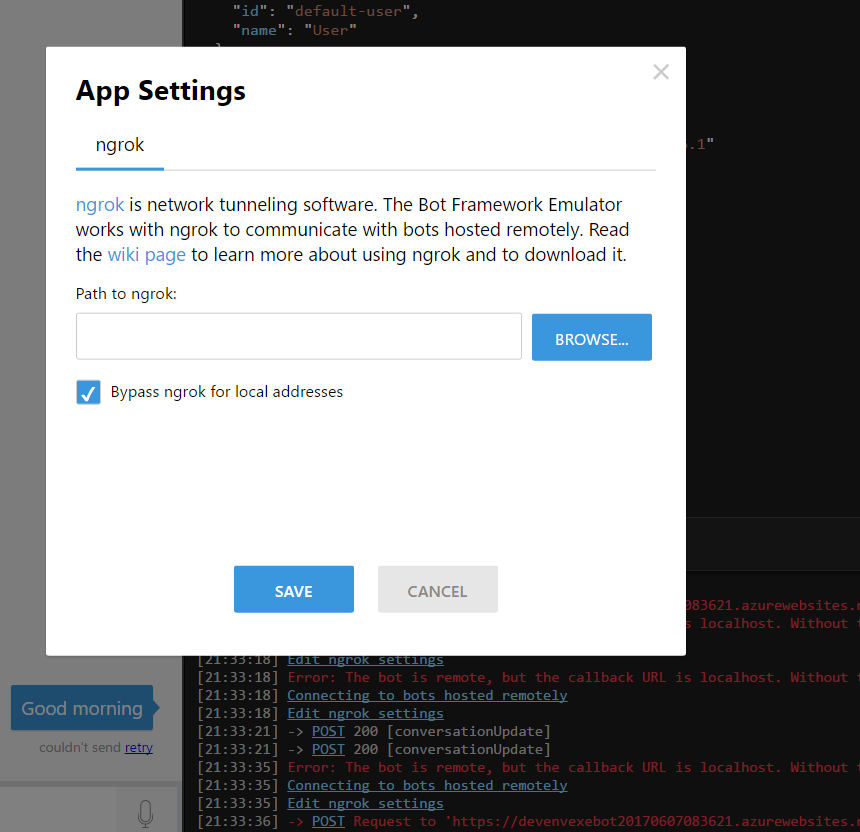
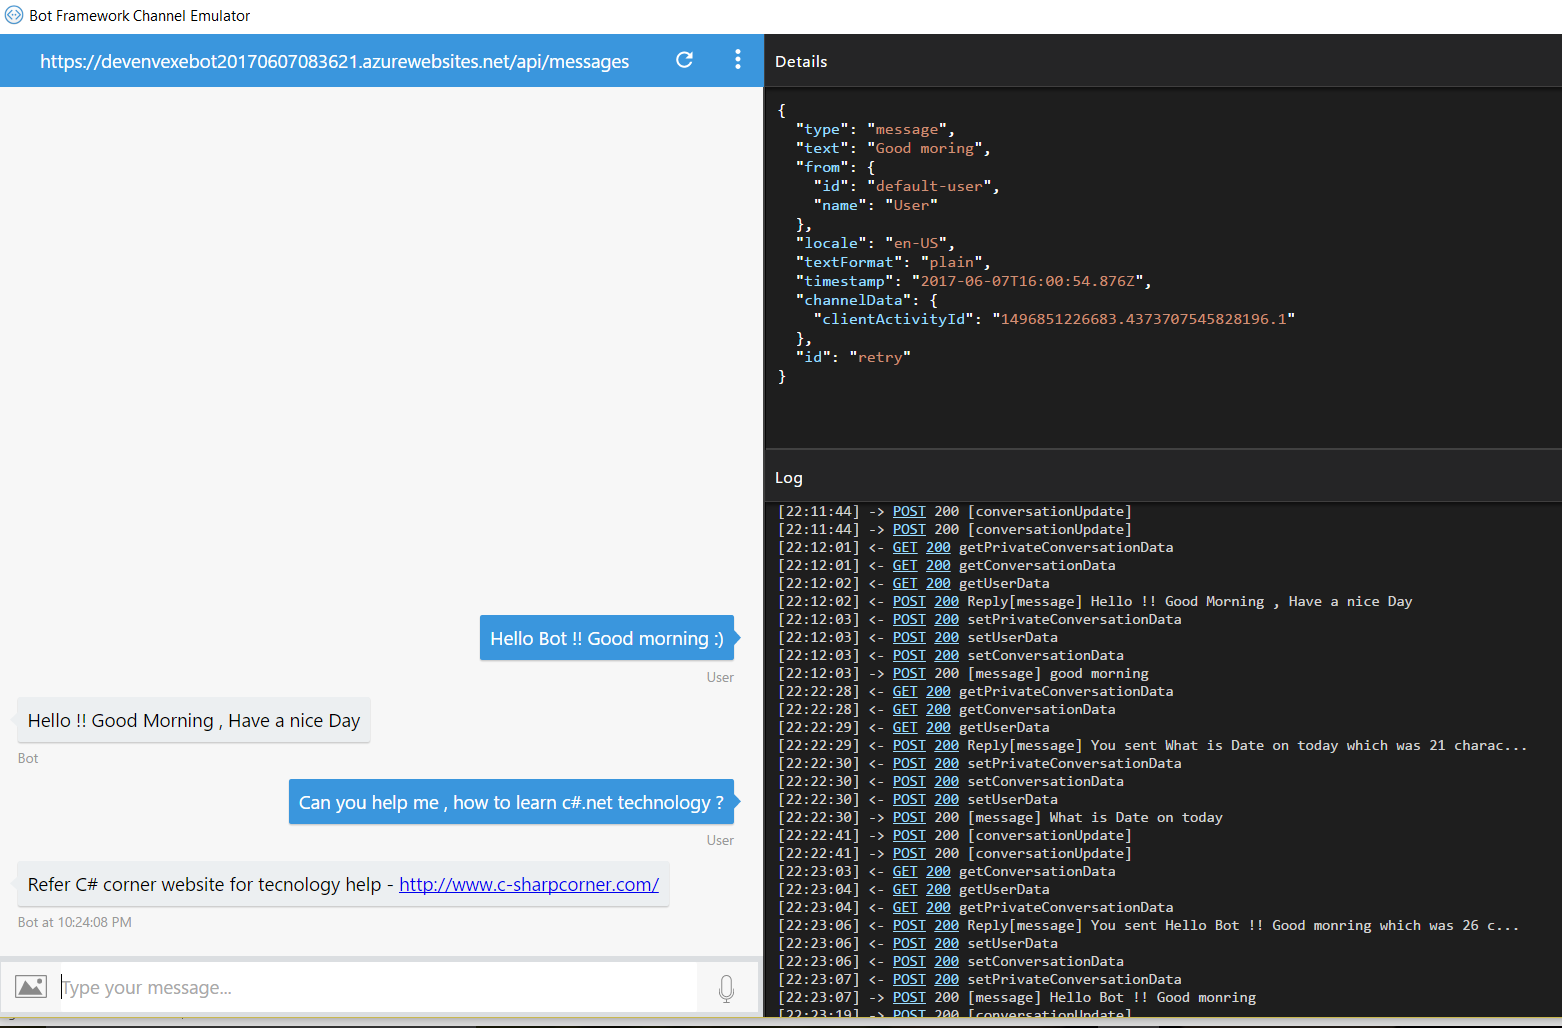
Test Bot Application:
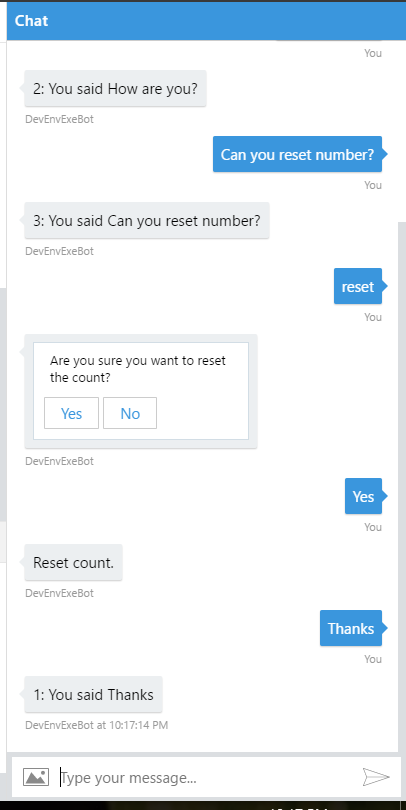
You can click on Test button and provide sample input text.

Summary
In this article, your learned about create and test a bot by using the Azure Bot Service. If you have any questions/ feedback/ issues, please write in the comment box.


Saturday, June 10, 2017

Getting Started Deploy a bot to Azure using Visual studio 2017

Introduction:


The Bot Framework enables you to build bots that support different types of interactions with users. You can design conversations in your bot to be freeform. Your bot can also have more guided interactions where it provides the user choices or actions. The conversation can use simple text strings or more complex rich cards that contain text, images, and action buttons. And you can add natural language interactions, which let your users interact with your bots in a natural and expressive way.
In this article, we can deploy a bot to azure using visual studio 2017, register app with bot portal and testing it with the Bot Framework Emulator.
Setup and Create New Bot Application.
You can read my previous article for Getting Started with Bots Using Visual Studio 2017 from following URL http://www.c-sharpcorner.com/article/getting-started-with-bots-using-visual-studio-2017/
You need azure account for deploy bot application to azure so If you do not have an Azure account, you can click following url for a free trial azure subscription. https://azure.microsoft.com/en-us/free/
Register Bot Application:
Step 1: Navigate to Bot Framework Portal from https://dev.botframework.com/
Step 2: Click on Sign in button and login with credential
Step 3:  Click on Create a Bot or Skill
Step 4: Click on Create a Bot and click on Register
Step 5: Upload relevant app png icon and max size should be 30k
Step 6: Provide your bot's Display Name.
Step 6: Provide a Description of your bot.
Step 7: Provide your bots Https endpoint in configuration section.
  • We are not yet deployed our bot to the cloud so leave the endpoint blank for now. we will return to the Bot Framework Portal later and specify the endpoint after we have deployed our bot.
Step 8: On the next page, click Generate an app password to continue.
Step 9: Copy and securely store the password that is shown, and then click Ok.
Step 10: Click Finish and go back to Bot Framework.
Step 11: Back in the Bot Framework Portal, the App ID field is now populated.
Click 12: Click on Register to complete the registration process.
Update Web Configuration file:
Open your project in Visual Studio and update the Microsoft App Id and Microsoft App Password values in your web configuration settings to specify the app ID and password values that were generated for your bot during the above registration process.
<appSettings>
   <!-- update these with your BotId, Microsoft App Id and your Microsoft App Password-->
   <add key="BotId" value="DevEnvExeBot" />
   <add key="MicrosoftAppId" value="2f3edda3-d36d-4d88-8acf-e448d870348e" />
   <add key="MicrosoftAppPassword" value="L6KOPcc3jqZB6hKPe06yxsH" />
 </appSettings>
Azure publishing wizard:
Step 1: Right click on Project > Select on Publish and start publish bot application into azure
Step 2: Select on Microsoft Azure App Service > select on Create New and click on Publish button
Step 3: Login with Microsoft azure account and click on create app service

Step 4: Copy the Destination URL value to the clipboard (you'll need this value later to test the connection to the bot)
Update Site Url from Bot Portal:
 Step 1: Sign in to the Bot framework Portal - https://dev.botframework.com/
  Step 2: Click My Bots.
 Step 3: Select the bot that you want to configure and click Settings.
 Step 4: Provide your bot's HTTPS endpoint. This is the endpoint where your bot will receive HTTP POST messages from Bot Connector. If you built your bot by using the Bot Builder SDK, the endpoint should end with /api/messages.
Step 5: Click on Save Changes.
Test Bot Application on Portal:
After publish Bot application into azure, you can test bot application from portal and emulator .
Step 1: Sign in to the Bot framework Portal - https://dev.botframework.com/
Step 2: Click on Test and provide input text


Test Bot Application on Emulator:
  1. Open Bot Emulator and Provide your bot's HTTPS endpoint with  api/messages .
  2. Provide Microsoft App ID and Password and click on Connect  
If you are getting following error, Click on Edit Tunneling (ngrok) setting.
download Tunneling (ngrok.exe) from https://ngrok.com/download and click on browse and associate ngrok.exe path
Click on refresh from Bot emulator and provide your input for test application
Download
You can download the complete source code from MSDN sample. 
Summary
In this article, your learned how to Deploy a bot to Azure using Visual studio 2017. If you have any questions/ feedback/ issues, please write in the comment box.