Drop Down MenusCSS Drop Down MenuPure CSS Dropdown Menu

Tuesday, February 7, 2017

Create Azure Active Directory Login

Introduction:
Microsoft Azure Active Directory (Azure AD) to add authentication and authorization to Our web, mobile Application and web APIs. In this article I shown below how to create / implement Azure Active Directory authentication login using xamarin.Forms .
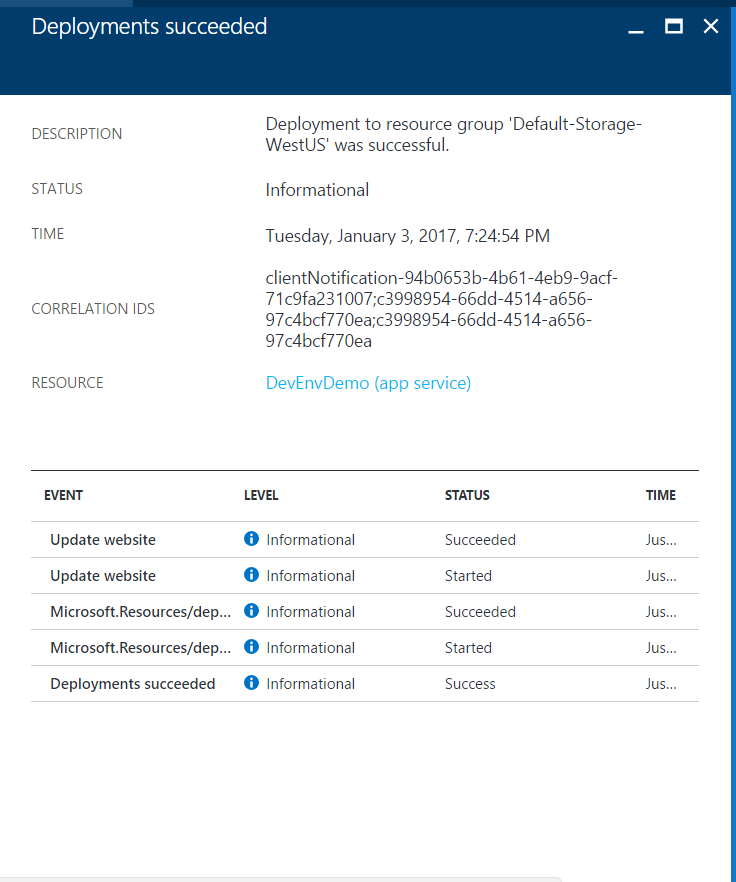
I have seen many article for the process of moving the management experience for all Azure services from the ‘classic’ portal at https://manage.windowsazure.com ,Here I am showing new portal at https://portal.azure.com for Azure AD Application creation and User creation .
Azure Subscription Login

The New Azure Portal is that you don’t need an azure subscription to use it. You and other administrators in your organization can manage your tenant in the new portal without any of you needing to get and manage to an azure subscription. You can directly sign -in as usual with your work or school account

Azure Active Directory Application creation:
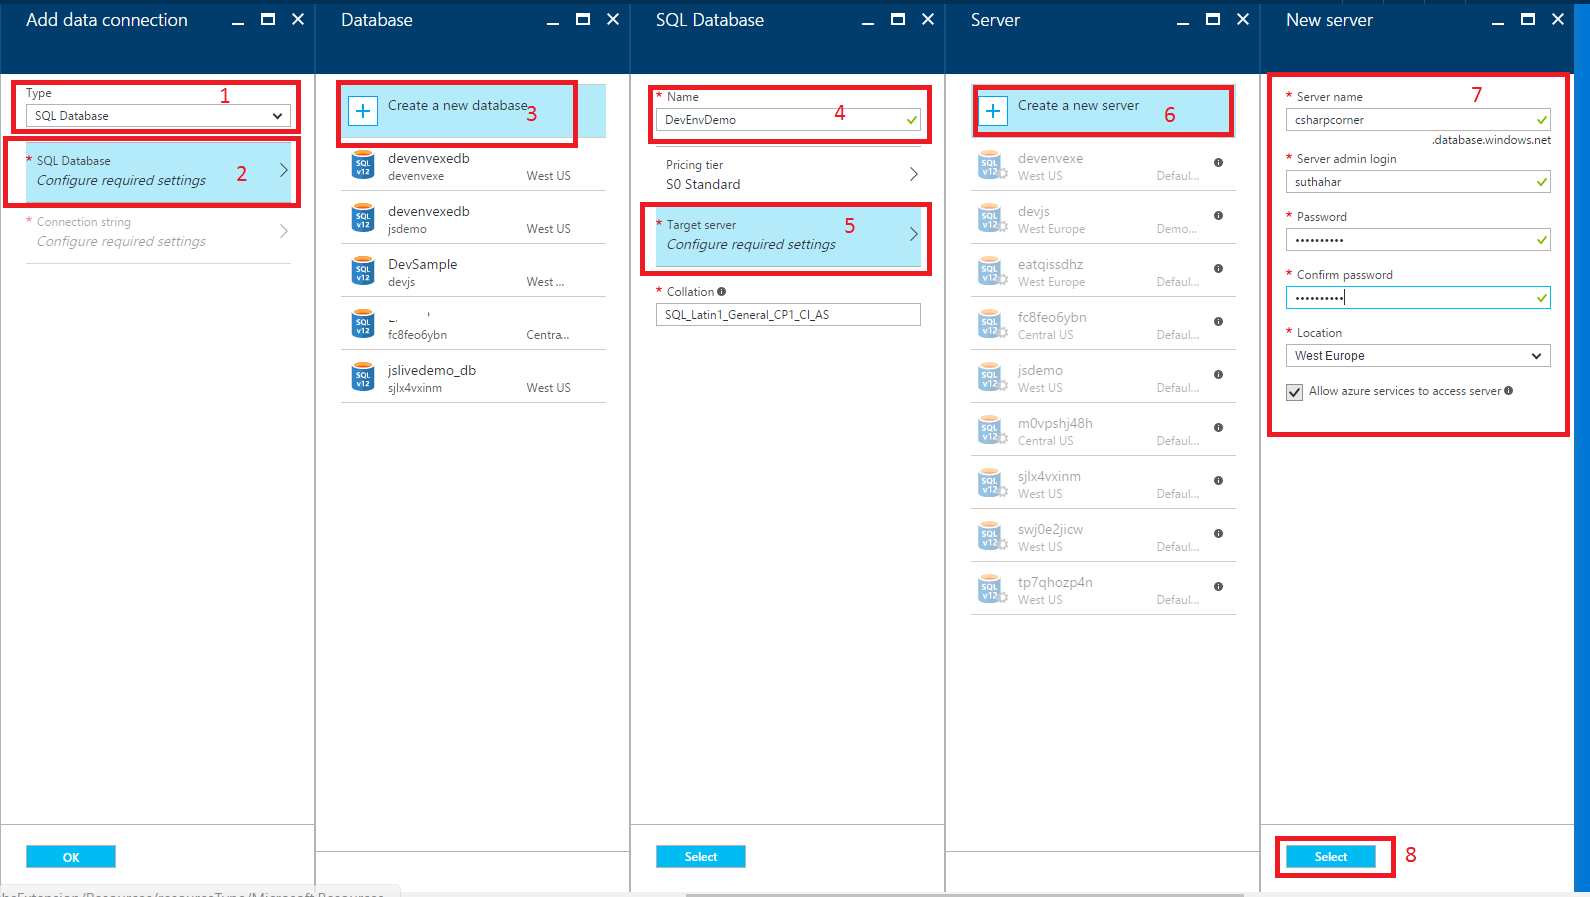
I will show below steps for application creation, user creation and permission configuration. While implement mobile application, we need Client ID, tenant, return url so here, I will show how to get all configuration information from following steps.
Step 1: App Registration:
Login to Microsoft Azure Portal https://portal.azure.com and choose Azure Active Directory from the sidebar.
The under Manage Select on App Registration => Click on + Add button
Provide the following details, name for the Application, select the Application Type as Native(Mobile application) or Web app/API, and for Sign-on URL enter your application URL and Click on Create
Step 2: App Required Permissions:
We need to give permission to access application from mobile or web so follow below steps for grand permission. Select on newly created application => Select on Required Permission => Click on Grand permission.


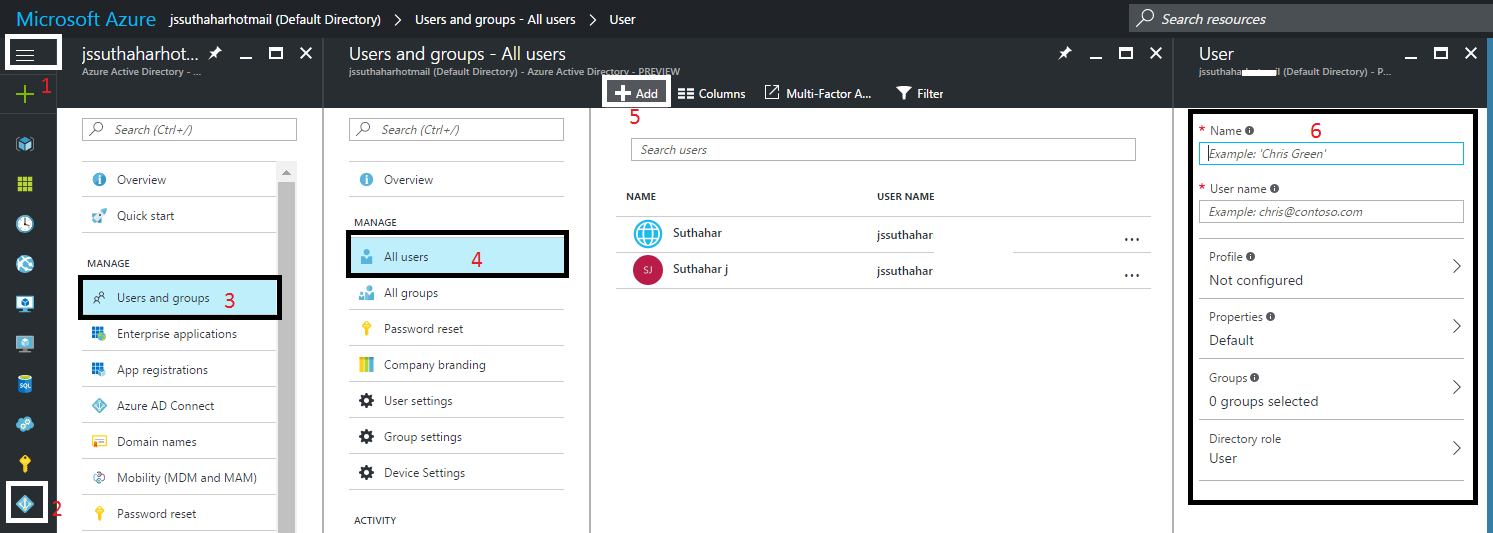
Step 3: Create new user:
Create user for access the application. choose Azure Active Directory from the sidebar => Select Users and groups =>Select All Users=> Click on +Add =>provide the user details as below Name of user, user name (email id).
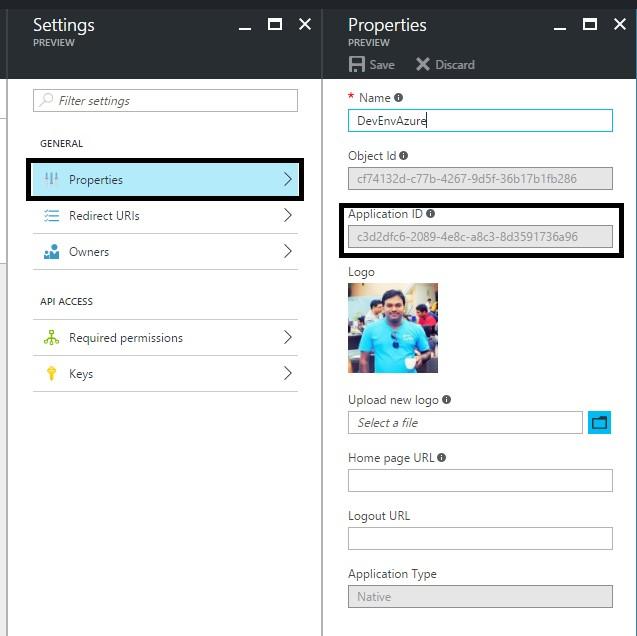
Step 4: Get Client ID and Redirect Url:
The Client Id is unique identifier for our application. We need client id for implement Azure AD authentication in mobile application so you can follow below steps for get client id. choose Azure Active Directory from the sidebar =>Select App registrations =>Select newly created application => Click on property = > Use Application Id as client ID
Click on Redirect Url under settings =>get redirect url / update redirect url


Step 5: Get Tenant:
We already register our application in a Azure AD tenant. We need tenant ID for implement AD authentication in mobile application. you can follow below steps get tenant id.
choose Azure Active Directory from the sidebar => Select on Properties => use Directory ID as tenant ID


You can implement Active directory login in Web ,Mobile ,Windows application using Client ID ,Redirect Url and Tenant ID ..

Sunday, January 8, 2017

Create Azure SQL Databases and Connect to the Local System

Introduction:
Azure SQL Database is a cloud-based relational database service from Microsoft. In this article, I will share following
  1. How to create an azure database and server.
  2. Configure Azure SQL Server firewall
  3. Connect to Azure SQL Database via SQL Server Management Studio (SSMS)
  4. Connect to Azure SQL Database via Visual Studio Server Object Explore
Prerequisites:
  1. Create a free trial azure subscription from Azure portal https://azure.microsoft.com/en-in/free/
  2. Install SQL Server management studio from here https://msdn.microsoft.com/library/mt238290.aspx
  3. If SSDI not installed in VS, Install SSDI from Visual Studio
    1. In Visual Studio menu click on Tools > Extensions and Updates > Select Updates/Install > Microsoft SQL Server Update for database tooling
Create Azure Database:

Step 1:
Logon to the Azure portal https://portal.azure.com with your registered azure Microsoft account.
Step 2:
Click on SQL Database Symbol > Click on + Add button for create new database
Step 3:
Provide Database name, Select Subscription name, you need to create resource group before create SQL server and Click on Server it will navigate to Sql Server page
C:\Users\DevEnvExe\AppData\Local\Microsoft\Windows\INetCacheContent.Word\2.000.jpg
Create Azure SQL Server:

Click on “+ create a new Server” > provide Server name, username, password and server location and click on Okay

Configure Azure SQL Server firewall

Azure SQL Database uses firewall rules to allow connections to your servers and databases so if you want to use Azure database into local machine. Need to add local IP address into Azure Database Firewall.
Step 1: Local machine IP Address
Open Run > type CMD > type ipconfig and get local machine ip address
Alternately you can open any browser > open google and type “what is my ip address”.
Step 2: Configure SQL Azure Firewall
Click on All Resources > Select Newly Created Database Server > Search “Firewall” and select Firewall > add your local computer ip address as per below.
Connect Azure Database and Server Via Local SQL Server Management Studio(SSMS):

SQL Server Management Studio (SSMS) is an integrated environment for accessing, configuring, managing the database like insert, update, delete. I have shown below steps for how to connect azure database to SSMS.
Step 1: Get Connection Details:
If you already noted Server details and login details, no need to do this step.
Click SQL Database > Select Database name > Search or Select Overview > Click on Connection String>Copy Server and database details

Step 2: Connect Database:
In Windows Start Page, type SQL Server Management Studio and the program will appear. Click the program to open SSMS. You might want to right-click the program and pin it to the Start Page. Alternately from the Run dialog box, type SSMS.exe and then click OK.
Provide server details and login details
Step 3: SQL Server Management Studio
After successfully login to SSMS, all the database loaded into the IDE like below  
Step 4: Open Query Window (Ctrl +N)
You can open new query window using menu icon or press Ctrl+N > type SQL query >Press F5 for execute query
Connect Azure Database and Server Via Visual Studio IDE

Visual studio is a developer environment. Server Explorer will help us for accessing, configuring, managing the database like insert, update, delete. I have shown below steps for how to connect azure database to Visual studio server explorer.
The Windows Start Page, type Visual Studio and the program will appear. Click the program to open Visual Studio. You might want to right-click the program and pin it to the Start Page. Alternately from the Run dialog box, type devenv.exe and then click OK.
Step 1: VS Server Explorer:
Open Visual Studio > Click on “ View “ Menu >  Select “SQL Server object explorer” > Select “SQL Server” and right click > Select Add SQL Server


Step 2: Connect Azure:
Provide your azure server details and login details in the Connect screen


Step 3: Azure Database access in Visual Studio:
After successfully login, select your database > right click Create, Edit, delete the table

Tuesday, January 3, 2017

Create Azure Mobile Apps Service

Azure Mobile App Service is easy to rapidly build engaging cross-platform and native apps for iOS, Android, Windows. We can use implement following mobile feature using Azure and create backend logic in C# or Node.Js
  1. Store data in Azure Cloud Storage
  2. Store image using blob storage
  3. Azure AD Authentication
  4. Send Push notification
  5. Access on-premises resource
This article will be an step by step guide on how to create mobile apps service using azure.

Prerequisites

  1. If you are not having Azure account, you can click here for a free trial azure subscription.
  2. If you want to get start with azure app service before signup to azure account. Try App Service
       
Create Mobile App Service
Step 1:
Sign -in into Azure portal
Step 2:
In the upper left corner of the azure portal. Click on + New and type Mobile Apps in search box like below
Step 3:
Select Mobile Apps and Click on Create
Step 4: Create Mobile App
Provide the App name, Resource Group name and click on create.
Step 5: Successfully created Mobile App Service:
After Click on Create. Wait a few minutes for the service to be deployed successfully before proceeding.
Step 6: Mobile Service Settings
Click on Menu > Select App Services > Select newly created App Service(DevEnvDemo) > Click on (…) > Select Settings


Step 7: Select Client Application platform:
Search “Quick Start” > Select client application platform (Xamarin,Windows,native App) > Select Database ( Click on Connect a database)
Step 8: Create Data Connection:
Click on + Add button


Step 9: Select or Create Database:
Select database connection type as Sql Database > Select Sql Database configure Setting > Create New Database or Select database > if New Database – provide new Database name > Select Server or create New Server > if new server – provide server details and click on Select > Click on Ok


Step 10: Data Connection Status
After Click on Ok. Wait a few minutes for the Data connection create successfully before proceeding or click Notification icon and check data connection is created or not


Step 11: Download Client Application and Mobile Service:
Select client application > select backend language (C# or node.js ) > Click on Download button for both client and cloud project
now you can download cloud and Client application
Step 11: Publish and Debug Server Project
  1. Download install language specific SDK https://azure.microsoft.com/en-us/downloads/
  2. Open Visual Studio as Run as Admin, rebuild the project to restore NuGet packages.
  3. In Solution Explorer, right-click the project, click Publish.
  4. Click on Microsoft Azure App Service > Next > sign-in with your Azure credentials.


  1. Select App service:


  1. Provide server details > click on validate connection and publish the service
Wait few minutes for deploy service  


Step 12: Run and Debug Application


Now you can Extract the client project that you downloaded, and then open it in Xamarin Studio or Visual Studio.


I believe this article will help you to create mobile app service in Azure. If you have any question or feedback, please share in the comment box.  

Monday, March 7, 2016

SQL Server on Linux


SQL Server will be able to install and run on Linux. The news was announced via a blog post by Scott Guthrie, EVP, Cloud and Enterprise Group at Microsoft

Tuesday, September 2, 2014

SQLite Database Browser


Database Browser for SQLite is a high quality, visual, open source tool to create, design, and edit

database files compatible with SQLite

                                               http://sqlitebrowser.org/